Laser Scanning is the initial step to reflect the true As-Built conditions and provide proper information for the specific model purpose. But what comes after? At Sirvey, we manage the entire process, including Scan to BIM, to provide comprehensive support.
But first, what is Scan to BIM?
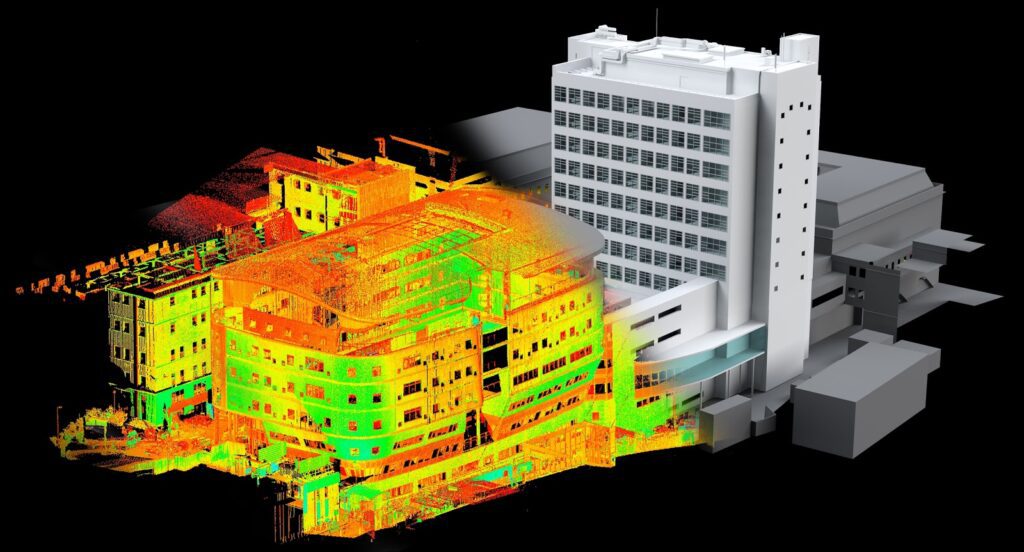
In simple terms, it involves taking millions of data points from an existing facility using point clouds, and then converting them into an intelligent 3D BIM model that represents the As-Built conditions. This model can be used for a variety of purposes, such as redesign and renovation, spatial coordination of new MEPs with existing ones, and facility management.
Architects, engineers, MEP designers, contractors, surveyors, and owners are among those who currently benefit from this technology, as it allows them to create accurate architectural, structural, and MEP models that reflect the actual conditions of a building.
Let’s check the suggestions!
That said, it is important to follow certain rules to produce a model that accurately reflects the as-built conditions and serves its intended purpose. Here are some suggestions to keep in mind:
- Quality: Before starting any Scan to BIM project, it’s essential to check the quality of the point cloud. These are 3D files made up of individual points in digital space, each with X, Y, and Z coordinates. These files contain vast amounts of information about an object, including its physical location, shape, color, and reflectivity. By checking the quality of the point cloud, you can identify any issues early on and prevent the need for future rework. Learn more about point clouds here.
- Coordinates: To ensure accurate location of a model, it’s important to ask the surveyor all the necessary questions. Properly locating a point cloud requires attention to detail, and it’s essential to verify that the origin point of the cloud is sufficiently close to the building. This helps the model stay within the Revit comfort zone and avoids potential export inaccuracies. In addition, if multiple point clouds belong to different zones or buildings, it’s important to confirm that the surveyor has correctly linked them together. By taking these steps, future headaches can be avoided.
- Drawings: It’s important to use the point cloud as the primary source of information, instead of relying on As-Built drawings. As-Built drawings can be inaccurate and fail to reflect the true conditions of the building, which can lead to discrepancies in the final model. Using the point cloud as the main source of information ensures greater accuracy and minimizes the risk of errors in the final product.
- Assumptions: It’s important to avoid making assumptions about the elements within the point cloud. If there is any uncertainty about which system an element belongs to, it’s better to leave it unassigned than to incorrectly assign it. Assigning an element to the wrong system can lead to errors in the final model, and it’s better to take the time to confirm the system before doing it. By avoiding assumptions and double-checking the system assignments, the final model will be more accurate and reliable.
- Visual verification: Automated tools can be useful for verifying the accuracy of a model, but a thorough walkthrough and manual quality control are still necessary. This approach can detect any inconsistencies and ensure confidence in the deliverables.
By following these suggestions, you can ensure that your Scan to BIM projects accurately reflect the true As-Built conditions and provide the necessary information for the specific model purpose. If you have any inquiries or doubts, feel free to contact us.
Needing Laser Scanning providers? We have the best pre-qualified Laser Scanning providers for you. Require a quote at Sirvey!